Under construction
This page is still under construction.
Description
This page contains the manual for the usage of the SynapseRT plugin in order to perform tests.
Usage
Imec will provide a JIRA ticket where tests can be performed. This will have a new issuetype called 'Test Plan'. This ticket will always be used to perform the tests.
When it has been communicated that your application has to be tested (again), Imec will open the 'Test Plan', assign the ticket to your tester and provide the tests.
Once the 'Test Plan' has been assigned to your tester, you can start testing.
Performing the tests
- Navigate to the Test Plan.
- The Test Plan can be found in your JIRA project. It will have the name 'Test Plan <Name of Application>'. If your project has multiple Applications, then the same amount of Test Plans will exist. Make sure to pick the correct one.
- Set the status of the ticket to 'In Progress'.
- Go to the 'Test Cycle' segment within the ticket. This segment contains all Test Cycles for your application.
- A Test Cycle will contain the tests that have to be performed and allows for the ability to alter the results.
- Open the correct Test Cycle by clicking on the cycle name (in the Cycle column, this should always be a date).
- Only 1 Test Cycle will ever be active at a time. It is this Active Test Cycle that you have to open.
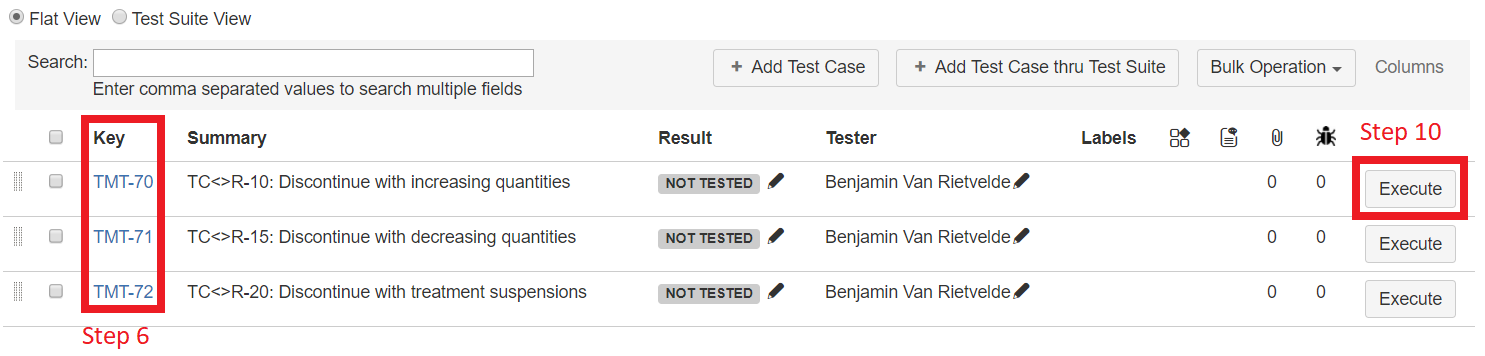
- A new page should have opened up. This is the Test Cycle Page. This will list and link all the tests that have to be performed for this cycle. It will also contain a small summary of the test details.
- The 'Key' column will link you to the JIRA ticket of a test.
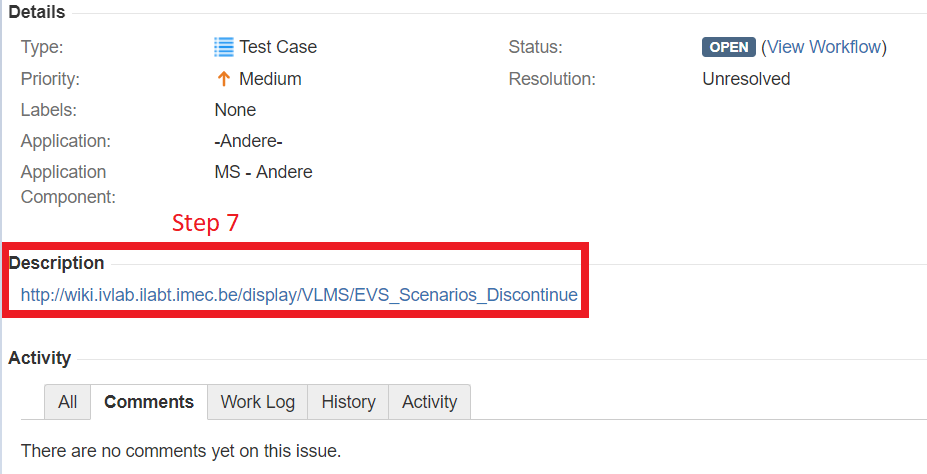
- In the description of this ticket, you will find a link to where you can find the test.
- All details on how to perform the test itself can be found here. The name of the ticket will be the test that you have to perform.
- While performing the test, make sure you save the various prints that the Application can generate (which one is necessary should be clear from the test description). Also save some screenshots of the UI, when it is relevant.
- After a test is finished, you can navigate back to the Test Cycle Page.
- Click on the 'Execute' button of the test that you have just performed.
- This will open the Test Run Page. Change the values of the 'Result' column to what you have observed from the results. The values can be 'Passed', 'Failed', 'Blocked, 'Not Tested' or 'NA'.
- It is important to note that the result of the entire Test Run will be derived from this, depending on priority. The priority goes like this: 'Failed' → 'Blocked' → 'Passed' → 'Not Tested' → 'NA'. This means that once a single Test Step Result is tagged as 'Failed', the entire Test Run will be considered failed. In order for a Test Run to be considered as 'Passed', each Test Step Result must be either 'Passed' or a value with lower priority than 'Passed'.
- You will notice that the Test Steps will contain codes like 'TS-1'. This points to the 'Expected Results' or 'Verify the following' part of a test (on the Confluence page).

- In the 'Attachment' segment, attach all the prints and screenshots that you have saved for this test.
- Once the results have been altered and the attachments were added, you can click on the close button.
- Steps 6 to 13 have to be done for each test in the Test Cycle.
- Once all tests have been completed, navigate back to the Test Plan ticket.
- Set the Test Plan ticket to 'Resolved'.


Workflow
This will describe the actions that have to be performed by the vendors. All details on how to perform said actions can be found in this manual.
New Test Cycle was created
Navigate to the Test Plan of your project → Set the ticket to 'In Progress' → Open the 'Active' Test Cycle Page → Perform the tests that are required for the Test Cycle → Alter the results of the Test Steps in the Test Run Page → Attach generated PDF and UI screenshots to the Test Runs → Set the Test Plan ticket to 'Resolved'